LET YOUR CREATIVITY FLOW THROUGH.
dIGITAL
ILLUSTRATIONS
GROUP
1
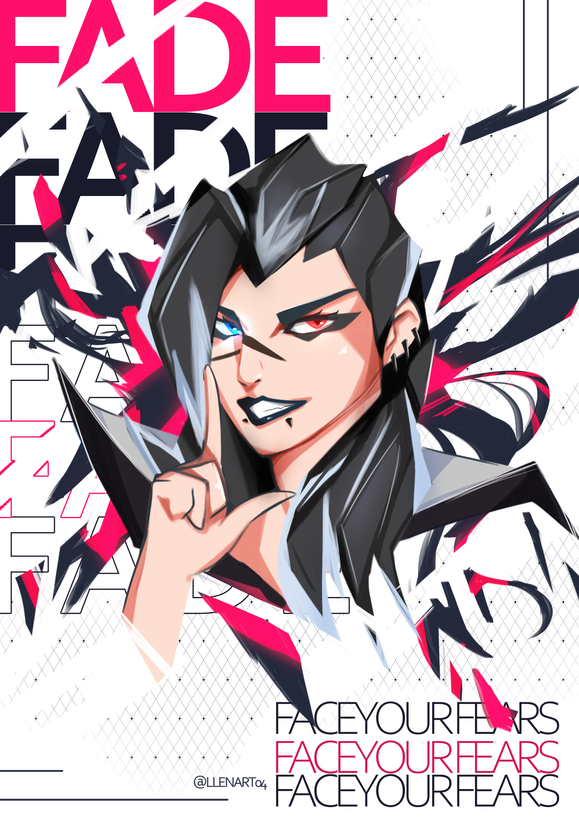
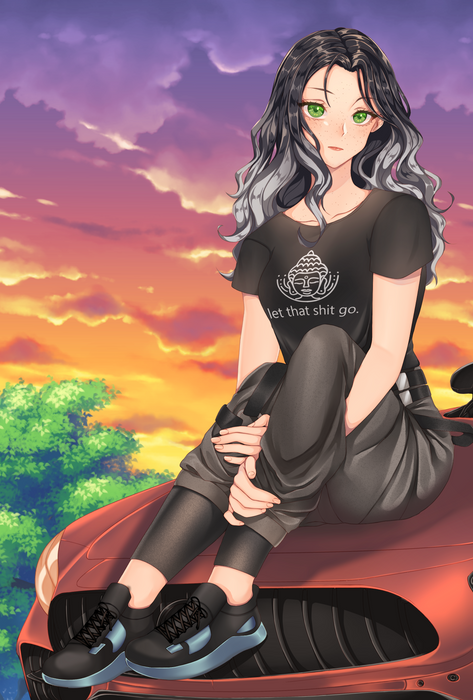
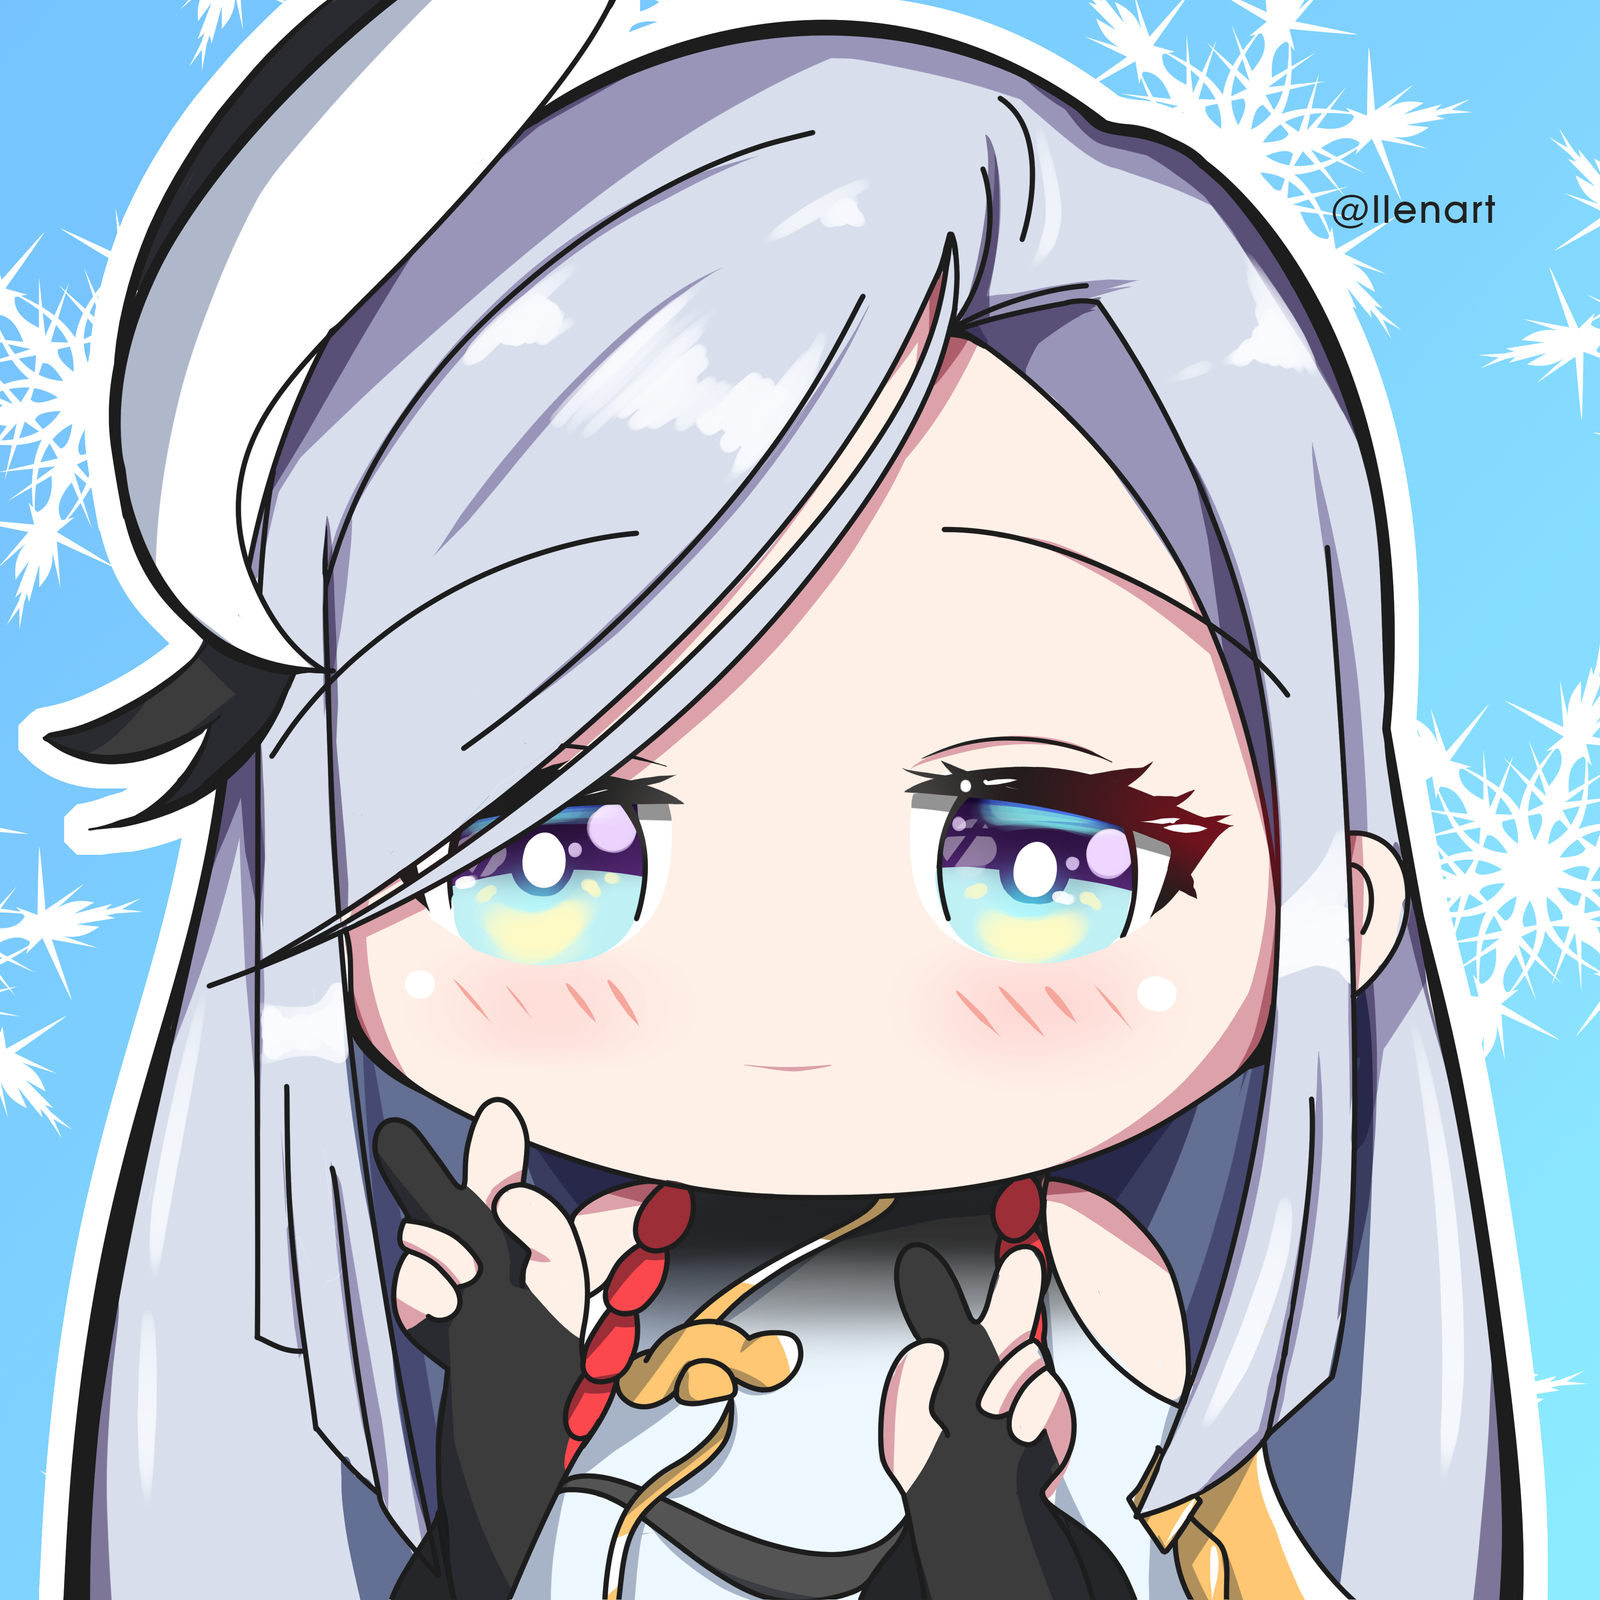
DIGITAL ART is a term used to describe art that is made or presented using digital technology

Delora Butler


It is similar to traditional art, where in we use pencils, pens, and paper but in Digital art, we use software applications and graphic tablets. Digital art can also be computer generated or scanned. Basically, anything with a computer. It is widely used everywhere in today’s era. Digital art is used in publications, media, bus advertising, and billboards.


BASIC TERMINOLOGIES IN DIGITAL ARTS
A sketch is a quick, freehand drawing that is not often meant to be a finished piece. A sketch can be used for a variety of things, including recording what the artist observes, developing an idea for later use, or quickly graphically illustrating an idea, concept, or principle.
Line art is described as the process of producing an illustration employing fundamental strokes of different weights and angles to show form and depth. It only emphasizes lines and does not feature any shading or gradient.
Coloring is the act of applying colors. It is the effect produced by applying or combining colors to an art piece. The process of adding value to a drawing is known as shading, and it is used to imply the presence of form, space, and most importantly, light. Shading can effectively create a convincing image and give a drawing the appearance of three dimensions. Shading is incredibly important when rendering a drawing that conveys volume.
Color Theory - It is the use of appealing color schemes in visual interfaces to engage the audience based on a set of rules and standards.

Step 1 - GATHER REFERENCE IMAGE
The first step in the drawing process is to gather inspiration.
Reference images are perfect for sparking ideas but also valuable resources to aid in the drawing process. You don’t need to search for a specific image that matches what you want to draw. You can also try having a mannequin or 3D model pose as a reference during the drawing process.
DIGITAL ART PROCESS
Step 2 - CREATE A ROUGH SKETCH
Creating a rough sketch is the next part of the digital art process. The keyword here is a rough sketch, not a perfect one. Take time to scribble out your figures and get a feel for how the composition of your piece will play out. Sketching quickly and without much detail will allow you to fine-tune things before you go on to create your outline.

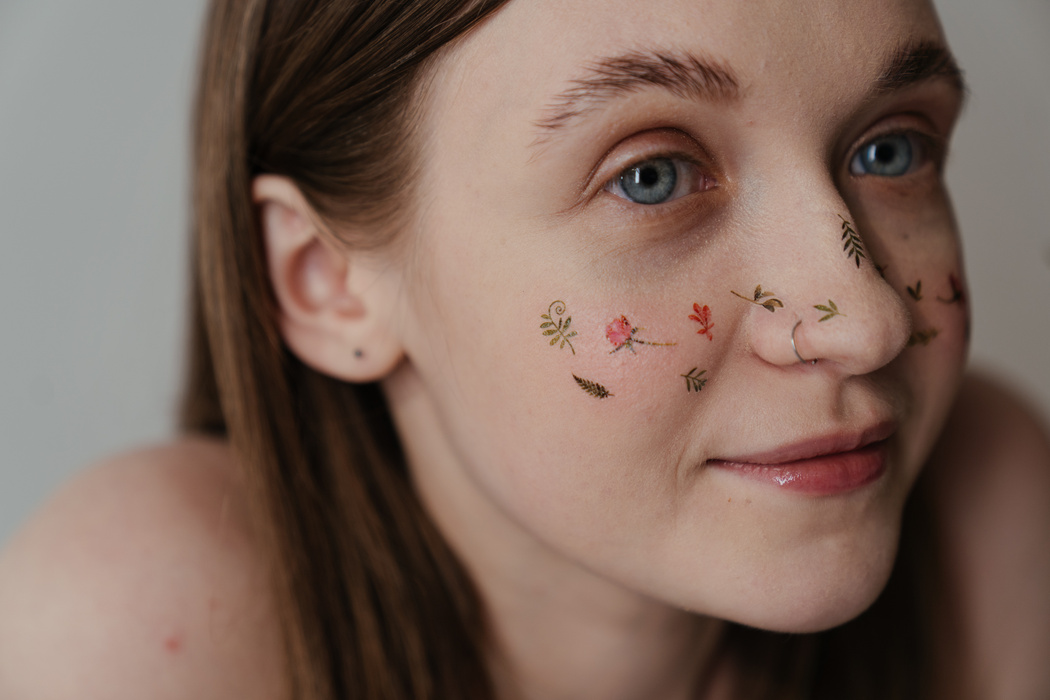
Step 3 - REDEFINE THE SKETCH
Once you’ve got your rough sketch down, it’s time to redefine it. This might mean creating a sharp outline you can colorize or just cleaning up your lines a bit, so the image is clearer. These details don’t have to be exact outlines. Rather, they’re suggestions so that you can understand the composition and perspective playing out in the piece.
Step 4 - CREATE LINE ART
When creating line art, work in a separate layer, and vectorize this layer if applicable. A vector outline means you’ll be able to edit it much more easily later on, such as by resizing or deleting sections. Vector outlines don’t lose their quality from file to file or even when being altered. A non-vector line art requires manual drawing, literally using your own hands and the pen of the tablet with long or short strokes in order to produce fine line work.

If you create line art, take time to ensure that each line is thick enough and anchored to another line. Each section should be closed, with no gaps or holes.
Step 5 - COLORING AND SHADING
Along with your reference board, you should include a color palette or general mood you’re going for in the piece. Start by adding color swatches next to certain elements in your reference images, and compare all these colors together
Once you’ve defined your larger areas of color, you can begin manipulating the values of these colors to add depth and dimension. You may also want to begin adding in smaller details such as wrinkles, texture, and light.
Be sure to keep light and shadow in mind as you’re painting your piece. You can always go over your piece with a lighter color, but your piece will look far more realistic if you make subtler changes in the values of an area.

Step 6 - ADDING BACKGROUND
The background's relationship to the artwork's main topic is its most crucial component. The background in a digital artwork is the area that depicts what is hidden by foreground objects and deep shadows in the background.
The setting is established by the background, which also gives the components an atmosphere. Every detail, including a wall's projected shadow and a pattern's repetition. The effect depends on a small aspect. A background has two advantages, it is attractive and visually connects the foreground subjects to it.
Step 7 - CLEAN UP
Wait! Your piece isn’t finished just yet. Too many artists fall into the trap of adding color, and it’s done. You still need to revise your piece and add in details. Some of these critical and often missed details include texture and organic features. If you’re not sure what to add or what to remove, take a break for about a day or two then come back to your artwork with a fresh mind.
Step 8 - SHARE YOUR WORK TO YOUR FELLOW ARTISTS
Don’t let your piece sit in silence! It deserves to be shown off to all your followers. Wait, you don’t have any followers? No worries. Curating a social media account takes time and effort.
Sign up for art-sharing sites and communities like Deviant Art or Fanbox. If you’re nervous about receiving criticism, don’t be. That criticism is exceptionally helpful, and it’s judging the piece, not you or your abilities as an artist.


TOOLS AND EQUIPMENT
- The first thing you will need is a Computer. The computer will be the main object that will be required to make a Digital artwork as it stores data, it will serve as a canvas, and will be running the softwares that you will be using.
- Smartphones or iPads/Tablets are another alternative for Digital Artworks. Some tablets and phones come with their own pen to use that are specifically made for drawing.
- Graphic Pen Tablet, which is considered as your brush and/or pencil. Although a mouse can also function as the main tool for painting on your computer, a Graphic pen tablet is more recommended as it is easier to use as if you are wielding an actual pencil on a paper.
- There are a lot of good brands that offer wonderful examples of Graphic Pen Tablets such as Huion, XP-Pen, and Veikk for those who are looking for tablets with a good deal. If the budget is not a problem, then it is recommended to go for the Wacom brands. Some Graphic pentabs nowadays are designed for mobile phones and tablets.


- Krita - Krita is a fun and user-friendly free digital art application. It has been around since 2004. Krita only includes 100 brushes to start with, making it appear "simple" in comparison to some of the more advanced digital drawing applications. This is a wonderful place to start if you're new to utilizing digital art software.
- MediBang Paint - Located in Shibuya-ku, Tokyo, MediBang, Inc. is a venture-backed Japanese business. It was founded on January 27, 2014. With free illustration/manga production applications including MediBang Paint, Jump Paint, and Manga name, it provides a number of mobile apps specifically geared toward producing art for manga.
- Fire Alpaca - Fire Alpaca is a free digital painting program that is cross-platform, supports Mac and Windows, and is available in ten languages. Drawing an illustration is made easy by simple tools and controls.
Free Digital Arts Softwares


Paid Digital Arts Softwares
- Corel Painter - Corel Painter is another widely used digital drawing program. More than 900 brushes are offered. Using Corel Painter, you may create your own digital workspace. You can arrange the brushes into groups based on your personal tastes to create a unique palette.
- Ibis Paint X - Ibis Paint X is a well-liked mobile app that is largely used by artists who draw on their phones. With more than a thousand brushes that you may personalize. The well-known painting program Ibis Paint X has received over 200 million downloads. This was created to enhance communication, inspire love of sketching, and improve your drawing abilities. This user-friendly app is available for those who are new to digital drawing.
- Clip Studio Paint - A highly developed comics and art program. Many professionals like the program. Professional artists, particularly comic book creators. "Clip Studio" is a common shortened form or "CSP".
- Paint Tool SAI - A user-friendly and basic drawing program. Despite having less functionality, the program still runs smoothly, even with a modest specification.


Industry Standard Digital Arts Software
- Adobe Suites/Creative Cloud - A well-known graphics program. With its extensive background and cutting-edge features, it has attracted a large number of skilled designers. It is best known for its software called “Adobe Photoshop”. The program is updated frequently. The addition of new features ensures that there is never a significant wait. The cloud subscription business model makes the modifications automatic. Your PC does not need to be downloaded with an updated version.
- Affinity Photo - Affinity Photo is the main rival to Photoshop's reign. Digital illustration is made simple by the robust program. It offers a wide variety of drawing tools and brushes. Although it lacks some of Photoshop's more specialized features, it still has a number of features that are comparable to Photoshop's.

Best Platforms to Share Your Artistic Content.
- Pixiv - The best place for Anime related content, perfect for otakus. It started in Japan but has now grown into a site with over 50 million artists from around the world. There are a lot of professionals in this site and Japanese illustrators choose to showcase their portfolio.
- Art Station - The video game industry and the film and animation industry is the main target of this site, but still welcomes any content creator and artists. Big companies showcase their content in this site.
- Deviantart - One of the classic sites to share artworks, in fact, you may have heard of it too! Artists can display their illustrations, gather a good following and audience, gain commissions, and create a community.
- Artfol - Launched in April 2021, it is one of the most recent art sites today. It focuses on listening to user feedback and aspiring artists gather here for inspiration and portfolio building. Artfol promises to feature all artists equally for more opportunities to be seen.

- Behance - A site where professionals aim to be commissioned rather than do art as a hobby. It can also serve as a portfolio for aspiring artists that aim to launch a successful career. At first glance, Behance seems to be intimidating to start-out artists, but it is a great place to gain constructive criticism.
- Instagram - Instagram is not a place mainly for art, however with its variety in content, it is easier to gain inspiration and build concept or mood boards. It is also easier to reach people since the site has many users and it uses hashtags, which organizes content easily. There are also a lot more art appreciators in the site, which can make commissions ecome easier to manage.
- Facebook page - Artists, public figures, businesses, brands, organizations, and nonprofits can connect with their fans or clients through Facebook Pages. Facebook users who like or follow a Page will start to see updates from that Page in their News Feed. A perfect site for artist to showcase their outstanding artworks and reach many audience


Speed Paint
Speed Paint


Speed Paint

Digital Art Eye Tutorial
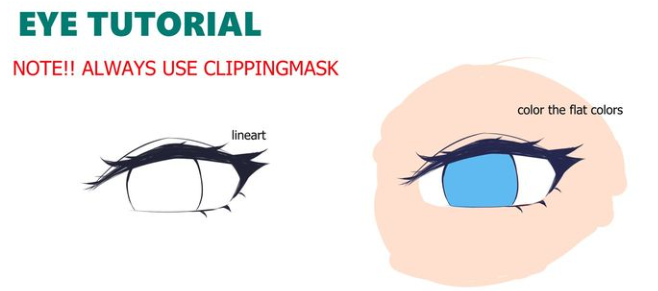
Line Art and Flat Colors
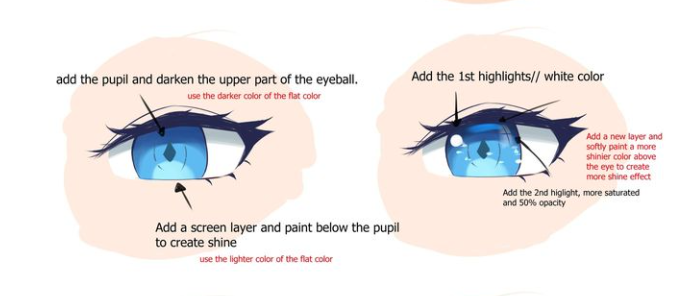
Shading and Highlights
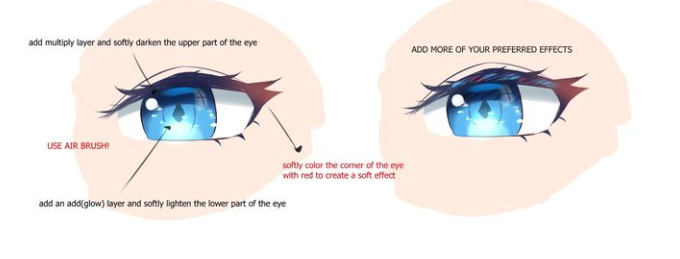
Final Touch and Effects

Line Art Tutorial
Hair Coloring Tutorial
Skin Shading Tutorial
